Backlog
The backlog is the backbone of the Scrum methodology. It is a prioritized list of work to be done to achieve the goals of a product/project/initiative. Additionally, it is dynamic and is regularly updated to reflect the changing needs of the project/product, business priorities, and user feedback.
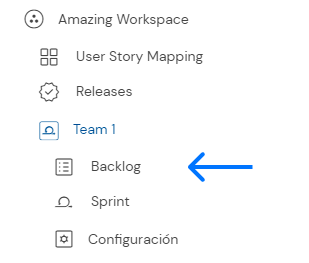
To navigate your team’s backlog, go to the Navigation Menu: Workspace > Team > Backlog:
How to interpret the Backlog in DoneTonic:
- At the top bar, you have a summary of information about the Backlog, such as the number of boards, pending tasks, etc.
- On the left are the PBIs or Product Backlog items, which are the fundamental unit of work in DoneTonic. PBIs can be user stories or product improvements. To create a new PBI, simply click on the + NEW PBI button.
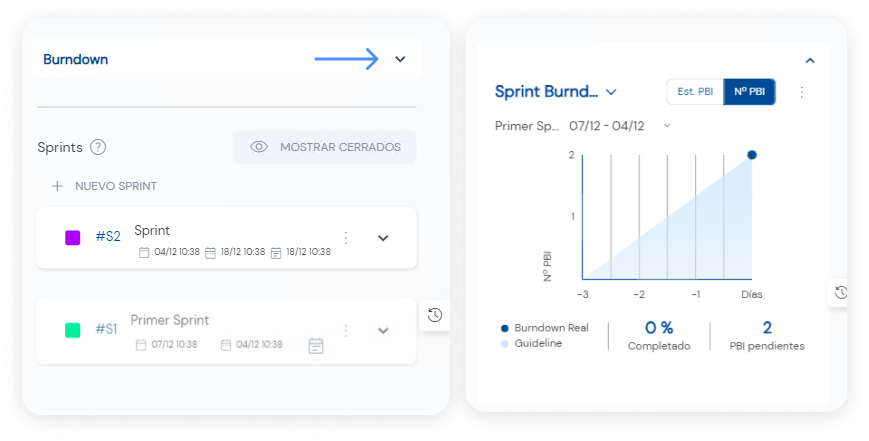
- On the right are the Sprints, short periods in which the team works on PBIs, and the Burndown Chart.
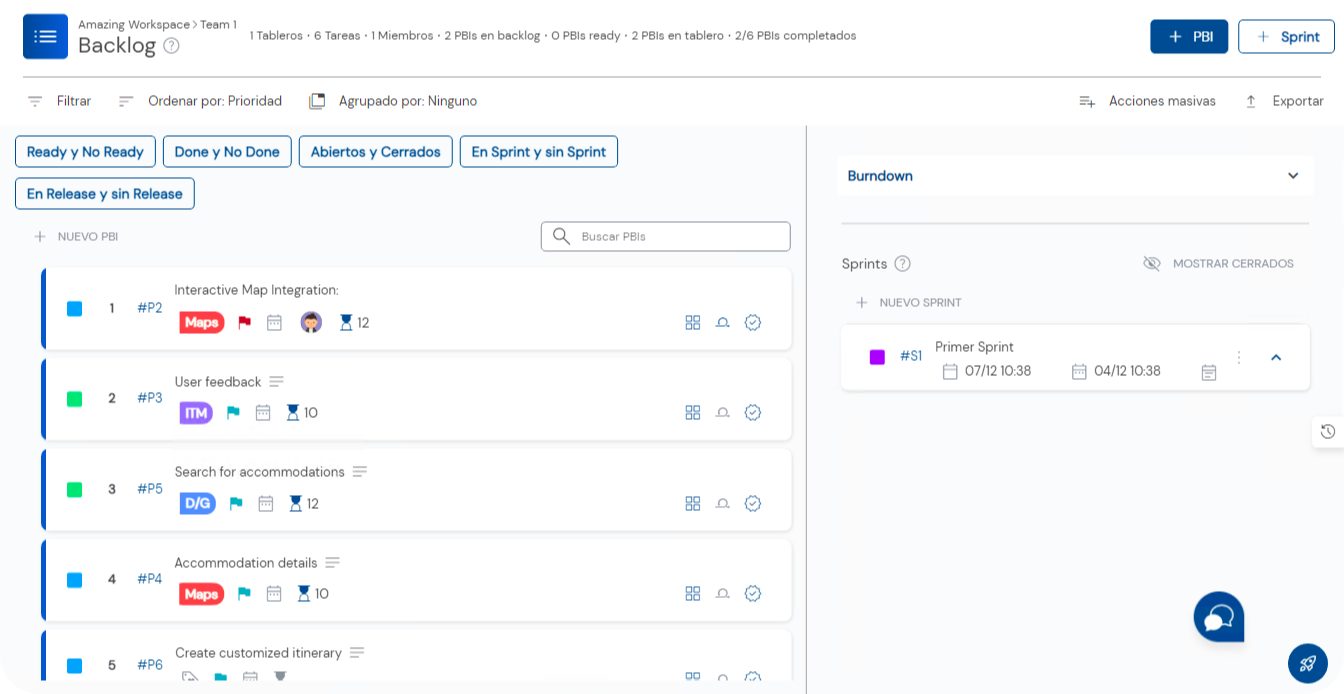
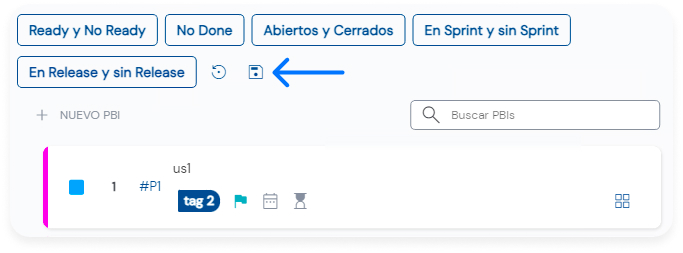
In the top bar, you find options for “Filter,” “Sort,” “Group by.” Also, in the upper section of the backlog, you can find options for agile filters:
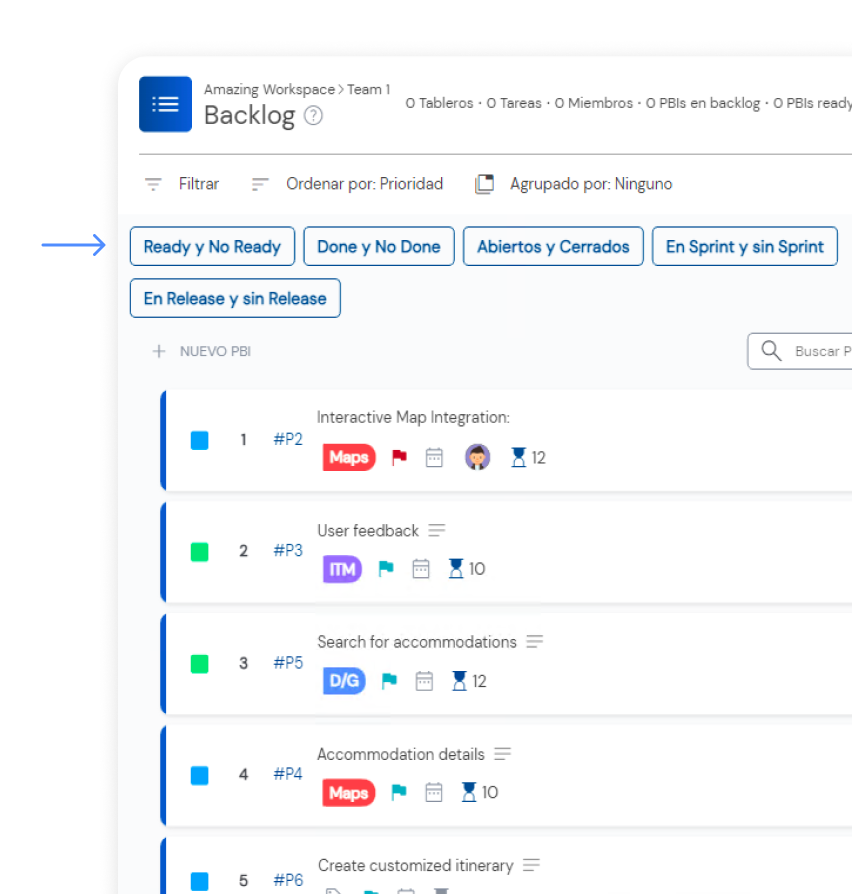
You can use these filters to view different perspectives of the Backlog. Below is a brief description of the agile filters:
- Ready/Not ready:
– Ready: PBIs that are refined and ready to be included in the next sprint.
– Not Ready: PBIs that still need refinement (priority, description, and/or estimation) before being included in the next sprint.
- Done/Not Done: Differentiate between finished and unfinished PBIs.
- Open/Closed: In DoneTonic, we consider PBIs closed if they are completed or canceled.
- Sprint/No Sprint
- Releases/No Release
Combine the agile filters to visualize the Backlog as you prefer. Additionally, you can save or restore the view:
Comenzar a crear el Backlog:
Getting started with creating the Backlog:
In Scrum, before starting to create your backlog, it’s recommended to set up a workflow. Here’s a quick guide to adding work to your backlog:
- Create your first PBIs.
- Refine your PBIs: Break down PBIs into smaller tasks, provide a description, set labels, priorities, and due dates.
- Plan your first sprint and drag the PBIs you want to include in the sprint.
- When you create the sprint, a Sprint Board is also created. Find it under the name you’ve given the sprint in the Navigation Menu > Team.
Closed Sprints:
In DoneTonic, when you complete a sprint, it automatically closes. If you want to see all your sprints, including the closed ones, in the sprint section, click on the ‘Show Closed’ button.
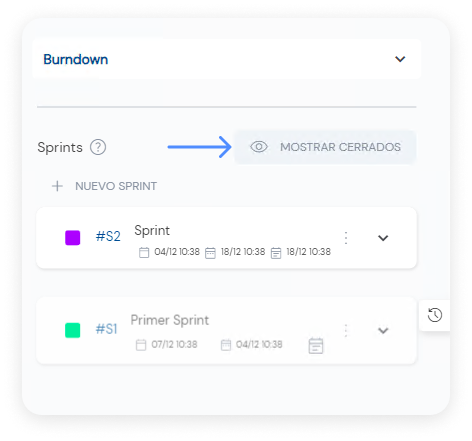
Burndown Chart:
In the DoneTonic Backlog, you will find the Burndown Chart, a visual graph representing the remaining work in a project over time, showing progress and helping predict when the planned work will be completed.
If you want to view this graph, simply click on the Burndown arrow to expand it.